How to Sterilize Nail Clippers at Home
Find a Podiatrist Near You
Get same-day appointments with verified podiatrists. Insurance accepted.
Knowing how to sterilize nail clippers at home properly — not just rinse them under the tap — matters more than most people realize. Nail clippers make contact with nail tissue, subungual debris, skin cells, and in infected nails, live fungal organisms or bacteria. These organisms do not die when the clipper is put away in a drawer. They survive on metal surfaces for weeks, ready to recontaminate the next nail the clipper touches.
This matters particularly for two groups: people who share nail clippers with family members (a very common source of fungal infection transmission within households), and people treating their own active nail infections who unknowingly reintroduce organisms to the same nails with each trimming session using a contaminated tool.
This guide explains the specific methods to sterilize nail clippers at home that are actually effective, the difference between cleaning and sterilizing, how often to do it, and the situations where nail clipper hygiene becomes a clinical priority rather than just a grooming habit.
Why Nail Clippers Are a Genuine Infection Transmission Risk
Most people think of nail clippers as a relatively clean tool — they only touch nail, after all. The clinical reality is different.
What nail clippers contact during normal use:
- The nail plate surface (potentially colonized with dermatophytes, molds, or bacteria in infected nails)
- Subungual debris — the material beneath the nail tip that contains the highest concentration of fungal organisms in infected nails
- The nail fold skin, which can harbor skin microflora and pathogens
- The fingertips of the person using the clipper
What survives on metal surfaces:
- Trichophyton rubrum and other dermatophyte fungi — the most common causes of nail fungal infection — survive on metal surfaces for weeks under normal conditions
- Staphylococcus aureus and other bacteria survive on hard surfaces for extended periods
- Viral particles survive on hard surfaces for variable periods
The specific risk scenarios:
Self-reinfection: A patient who has been treated for nail fungal infection trims their nails with the same clippers they used during the active infection. The clippers were contaminated with viable fungal organisms. Those organisms are deposited back onto the nail tip, restart colonization, and the infection appears to have “come back” — when it was actually maintained by the contaminated tool.
Household transmission: Shared nail clippers within a family with one infected member transfer viable fungal spores to all other family members using the same tool. This is one of the most consistent household transmission routes for dermatophyte nail infections.
Successive nail contamination: Using the same clipper on multiple nails in the same session without decontaminating between nails can transfer organisms from an infected nail to nails that were previously unaffected. This is how infections commonly spread from one nail to adjacent nails.
Cleaning vs Disinfecting vs Sterilizing: What You’re Actually Achieving at Home
These three terms describe different levels of microbial reduction, and understanding the difference prevents both false confidence and unnecessary anxiety.
Cleaning removes visible debris — nail dust, skin cells, subungual material — through mechanical action with water and soap or brushing. Cleaning is a necessary first step but does not reliably kill organisms. It reduces the number of organisms present and removes the organic material that can protect organisms from disinfectants.
Disinfecting uses chemicals or heat to kill most organisms on a surface. The word “most” is important — disinfection does not eliminate 100 percent of all organisms, but it reduces viable organism counts to levels that are not clinically significant for nail care purposes.
Sterilizing (in the medical sense) eliminates essentially all organisms, including bacterial spores. True sterilization requires professional equipment — autoclaves (steam under pressure), dry heat ovens, or chemical sterilants — that are not practical for home use.
What you can realistically achieve when you sterilize nail clippers at home: High-level disinfection — not true sterilization in the clinical sense, but sufficient for home nail hygiene purposes when done correctly and consistently. Calling the home process “sterilizing” is common usage even though technically it achieves disinfection.
The 4 Proven Methods to Sterilize Nail Clippers at Home

Method 1: Isopropyl Alcohol (70 to 90 Percent) — The Most Effective and Practical
Isopropyl alcohol at 70 to 90 percent concentration is the most effective and most practically convenient method to sterilize nail clippers at home. It is the standard disinfectant used in clinical settings for metal instruments and is effective against dermatophyte fungi, bacteria, and many viruses.
Why 70 percent is effective (and 99 percent is actually less effective):
Isopropyl alcohol requires water present to denature proteins effectively. At 70 percent concentration, the water component carries the alcohol into cell membranes where it disrupts lipids and proteins. At 99 percent concentration (pure isopropyl), the rapid evaporation before adequate contact time reduces effectiveness. 70 to 91 percent is the optimal range.
How to sterilize nail clippers at home with isopropyl alcohol:
- First, clean the clippers: Rinse under warm running water and scrub with a small brush (an old toothbrush works well) to remove all visible debris from the blade joint and cutting edges. This step is not optional — organic material remaining on the clipper physically protects organisms from the disinfectant.
- Dry thoroughly: Pat dry with a clean cloth or paper towel.
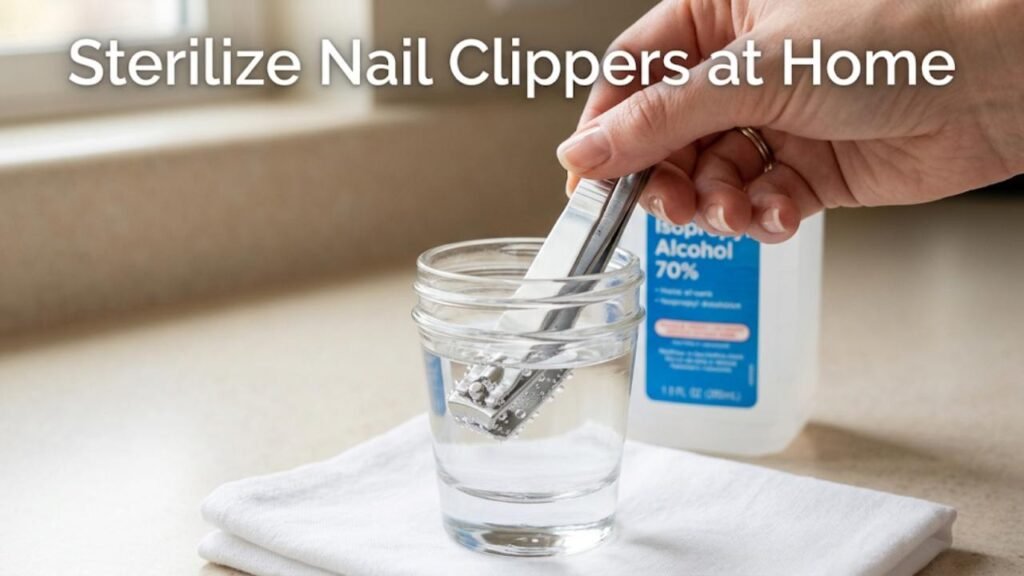
- Apply alcohol: Pour 70 to 91 percent isopropyl alcohol into a small container (a shot glass or similar) and submerge the clippers completely for 10 minutes. Alternatively, saturate a cotton pad or cotton ball with alcohol and wipe all surfaces of the clippers thoroughly — blades, joint, spring mechanism — and allow to air dry without wiping.
- Allow to dry: The alcohol evaporates and does not need to be rinsed off. Allow to dry completely before storing.
Effectiveness against nail fungal organisms: Isopropyl alcohol at 70 percent is effective against dermatophyte fungi and their spores when contact time is sufficient. The 10-minute soak significantly outperforms a quick wipe in terms of fungal spore reduction.
For active fungal infection treatment: If you are actively treating a nail fungal infection and trimming or filing the nail as part of treatment management, soak the clipper for the full 10 minutes after each session. Quick wiping is insufficient when active fungal organisms are present.
Method 2: 3 Percent Hydrogen Peroxide
Hydrogen peroxide at 3 percent concentration — the standard pharmacy grade — is a practical method to sterilize nail clippers at home, particularly effective at removing organic material (it produces visible bubbling when contacting nail debris) alongside killing organisms.
How it works: Hydrogen peroxide is an oxidizing agent that kills organisms through oxidative damage to cell components. The physical bubbling action when it contacts organic material mechanically helps dislodge debris from the blade joint.
Effectiveness: Effective against many bacteria, fungi, and some viruses. Less effective than isopropyl alcohol against some bacterial spores, but for the organisms relevant to nail care (dermatophytes, bacteria causing nail fold infections), it is adequate.
How to sterilize nail clippers at home with hydrogen peroxide:
- Clean first: Remove all visible debris with brush and water.
- Soak in hydrogen peroxide: Submerge the clippers in 3 percent hydrogen peroxide for 10 to 15 minutes.
- Observe the reaction: Visible bubbling where the solution contacts organic material is normal and indicates effective contact.
- Rinse with clean water: Unlike alcohol, hydrogen peroxide should be rinsed off with clean water after soaking.
- Dry completely: Dry thoroughly to prevent corrosion before storing.
Limitation: Hydrogen peroxide can potentially cause some surface oxidation (rust) on lower-quality clipper metals over time with very frequent use. High-quality stainless steel clippers are more resistant to this.
Method 3: Boiling Water — Effective but With Limitations
Boiling water (100°C at sea level) kills many organisms including dermatophyte fungi and most bacteria. It is a practical method to sterilize nail clippers at home using only equipment anyone has available.
Effectiveness: Heat kills organisms by denaturing proteins. At boiling temperature, most vegetative bacteria and fungi are killed within minutes. Bacterial spores are more resistant and may survive boiling — but bacterial spores are not the primary concern for nail care hygiene.
How to sterilize nail clippers at home with boiling water:
- Clean the clippers first: Remove visible debris before boiling — this reduces the organic load and improves heat penetration.
- Bring water to a full boil: Use enough water to fully submerge the clippers.
- Submerge the clippers: Use tongs to place the clippers fully into boiling water.
- Boil for 10 minutes: Maintain at a full rolling boil for the full time.
- Remove with clean tongs: Do not use bare hands — the metal will be very hot.
- Cool on a clean surface: Place on a clean cloth or paper towel and allow to cool and dry completely before use or storage.
Limitations of the boiling method:
- Repeated boiling can accelerate oxidation and may affect clipper mechanism quality over many repetitions with lower-quality tools
- Does not achieve true sterilization (bacterial spores can survive boiling)
- Less practical for quick post-use disinfection than alcohol wipe
The boiling method is most appropriate for occasional deep cleaning rather than routine post-use disinfection.
Method 4: Soap, Scrubbing, and Hot Water — Cleaning, Not Sterilizing
Hot water and soap with thorough scrubbing is the minimum baseline for nail clipper hygiene and should precede any of the above methods. However, soap and water alone is not sufficient to sterilize nail clippers at home — it is a cleaning step, not a disinfecting step.
What it achieves: Removes visible debris, reduces organic material load, removes some organisms mechanically. Warm soap and water with a brush cleans the blade joint (the area of highest contamination) more effectively than any of the chemical methods used without prior cleaning.
Use this as Step 1, always: Every effective method to sterilize nail clippers at home starts with soap, water, and mechanical scrubbing. The subsequent disinfection step (alcohol, hydrogen peroxide, or boiling) is significantly more effective on a pre-cleaned clipper than on one with debris still present.
Comparing the Methods
| Method | Effectiveness | Practical for Daily Use | Special Considerations |
|---|---|---|---|
| 70% isopropyl alcohol (10-min soak) | High — best for fungal organisms | Yes — quick and simple | Rinse not required; allow to dry |
| 70% isopropyl alcohol (wipe) | Moderate — better than nothing | Yes — fastest option | Less effective than soak for active infection |
| 3% hydrogen peroxide (soak) | Moderate-high | Yes | Rinse after; possible corrosion over time |
| Boiling water (10 min) | High for vegetative organisms | Less practical | Good for deep cleaning; not ideal daily |
| Soap + water (scrubbing only) | Low — cleaning only | Yes | Always do first; not sufficient alone |
How Often to Sterilize Nail Clippers at Home
The appropriate frequency depends on the situation:
After every single use — mandatory when:
- The clipper was used on a nail with confirmed or suspected fungal infection (active infection, discolored/thickened nail)
- The clipper was used on an ingrown nail with any redness or discharge
- More than one person used the clipper in the same session
- The clipper was used on anyone else’s nails at any time
After every use — recommended when:
- The clipper is used for routine maintenance and you want to protect against future infection
- You have had a nail fungal infection previously and want to prevent recurrence via tool recontamination
Before first use on a new person — always:
Even a brand-new clipper should be wiped with alcohol before being used by anyone who did not purchase it themselves. Contamination during manufacturing, packaging, or retail handling is possible.
Weekly minimum — for clippers used for solo personal maintenance on healthy nails:
Even for routine personal use without active infection, weekly disinfection maintains the tool in a hygienic state between uses.
Critical Hygiene Rules Around Nail Clippers
Beyond how to sterilize nail clippers at home, these practices prevent the situations where contamination matters most:
Do not share nail clippers between household members
This is the single most consistent recommendation from podiatrists and dermatologists regarding nail clipper hygiene. Sharing clippers is one of the most direct transmission routes for nail fungal infection within households. Each person should have their own dedicated clipper.
Use separate clippers for infected and uninfected nails
If you have active fungal infection in some nails and not others, using the same clipper creates direct transfer risk. Use one clipper for infected nails (sterilize immediately after) and a separate clipper for unaffected nails.
Never share clippers with people outside the household
At salons, events, or any shared setting, nail clippers that have been used on anyone else should not contact your nails without confirmed sterilization.
Replace clippers when blades become dull
Dull blades require more force, produce less clean cuts, and create more nail edge debris and micro-trauma than sharp blades. Standard nail clippers do not have replaceable blades — when they start tearing rather than cutting cleanly, replace the clipper.
Watch for rust
Rust indicates surface degradation that creates irregular surfaces where organisms can be protected from disinfectants. Rust also indicates that the metal quality is compromised. Discard rusty clippers — they cannot be adequately sterilized regardless of method.
Storing Sterilized Nail Clippers
Sterilizing nail clippers at home is only effective if storage does not immediately recontaminate them.
Effective storage:
- A dedicated small cloth pouch or case that is itself clean
- A covered container (small tin or box) stored in a dry location
- Not in a shared bathroom drawer with other potentially contaminated items
- Not loose in a handbag or pocket where they contact other surfaces
The bathroom storage problem:
Most people store nail clippers in the bathroom — one of the highest-humidity environments in the home. Humidity promotes bacterial and fungal growth on surfaces. Ideally, store sterilized clippers in a bedroom drawer or other drier location. If bathroom storage is necessary, ensure the clippers are completely dry before storage and stored in a closed container.
Frequently Asked Questions
Is rubbing alcohol enough to sterilize nail clippers at home?
Yes — 70 to 91 percent isopropyl alcohol used as a 10-minute soak after cleaning is the most practical and effective home disinfection method for nail clippers. It is effective against the dermatophyte fungi responsible for most nail infections and eliminates bacteria relevant to nail hygiene.
Can I use hand sanitizer to sterilize nail clippers at home?
Most hand sanitizers contain 60 to 70 percent ethanol — effective as a disinfectant for hand hygiene but less reliable for metal tool disinfection because the gels and additives may not achieve adequate surface contact on metal, and the contact time is typically too brief. Isopropyl alcohol directly applied is more effective.
How long do fungal organisms survive on nail clippers?
Dermatophyte fungi can survive on hard surfaces including metal for weeks under normal conditions. This is why a single use of a clipper on a fungally-infected nail without subsequent disinfection creates ongoing recontamination risk for subsequent trimming sessions.
Should I sterilize nail clippers at home if I don’t have a nail infection?
Yes — routine disinfection after each use prevents the buildup of organisms that could eventually cause infection, and prevents inadvertent household transmission if a family member does develop a nail infection. It takes 60 seconds with an alcohol wipe after cleaning and provides meaningful protection.
Summary
Knowing how to sterilize nail clippers at home effectively requires understanding both the method (clean first, then disinfect with alcohol, hydrogen peroxide, or boiling) and the context (when sterilization is critical versus when routine cleaning is sufficient).
The most practical and effective approach for most people: soap and water scrubbing first to remove debris, followed by a 10-minute soak in 70 percent isopropyl alcohol, then allow to air dry completely before storage. This kills dermatophyte fungi and relevant bacteria, prevents household transmission, and eliminates the tool-recontamination mechanism that drives many apparent treatment failures and recurrences.
For households where anyone has an active nail fungal infection, sterilizing nail clippers at home after every use — with dedicated clippers for that person, not shared — should be treated as a required part of managing the infection rather than an optional hygiene step.
Struggling to get an appointment?
We help patients in your area bypass clinic waitlists by instantly finding verified podiatry doctors who accept their insurance.